
How to embroider on crochet
If an amigurumi piece has embroidered details, it’s usually the very last step. These tutorials walk you through a few common details you might want to embroider onto your amigurumi to either give them a little bit more pizzaz or, in the case of embroidered eyes, make them safe for kids and pets.
How to embroider amigurumi eyes (step-by-step with photos)
Finish the piece that’ll be embroidered onto.
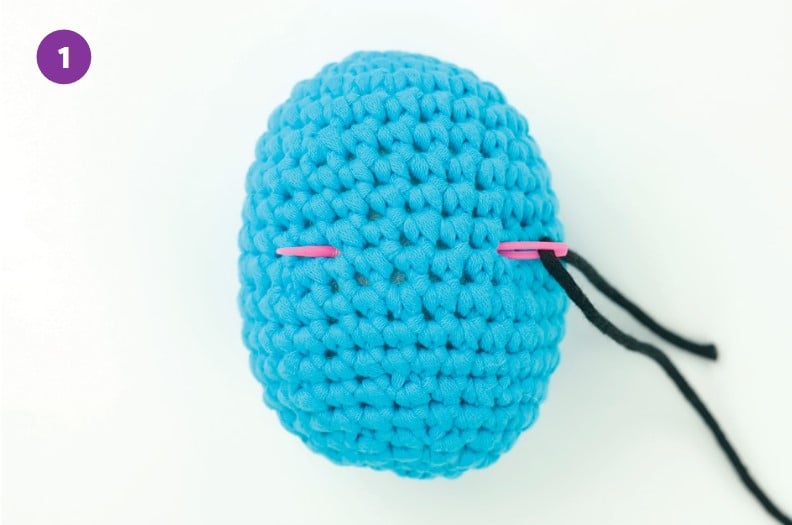
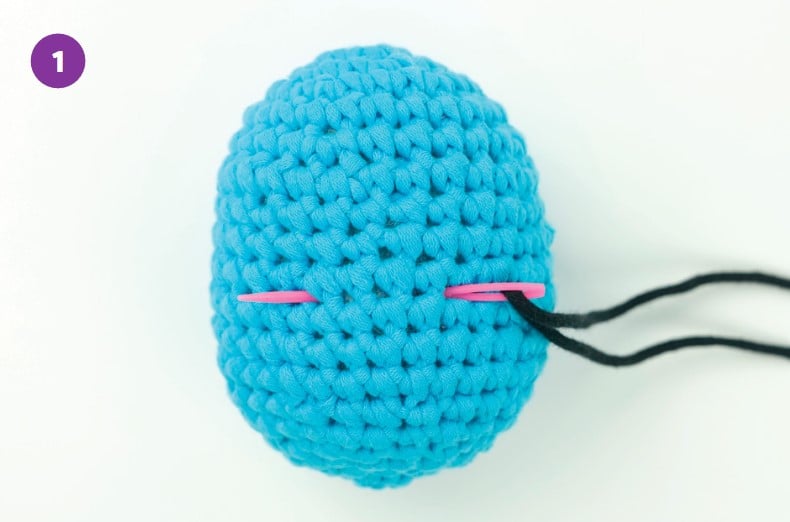
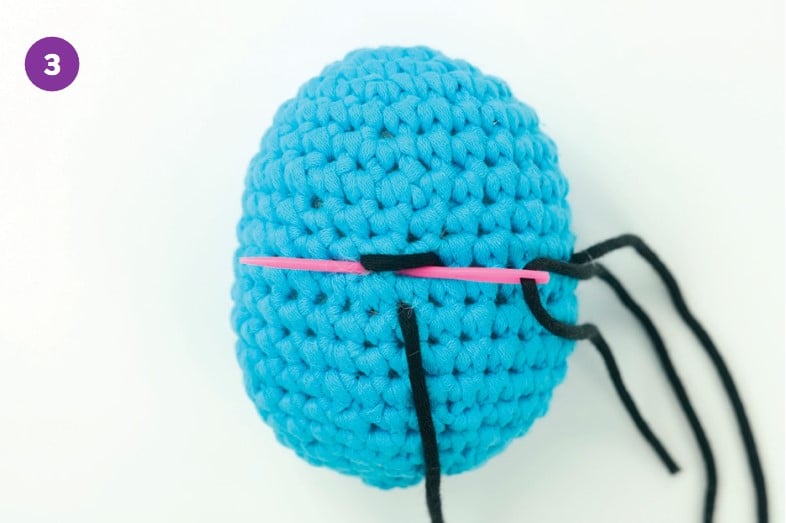
1. Thread a needle with an arm’s length of black yarn. Insert the needle somewhere on the right side of the amigurumi, and out where you want the bottom of the right eye to be. Leave a 6-inch yarn tail.
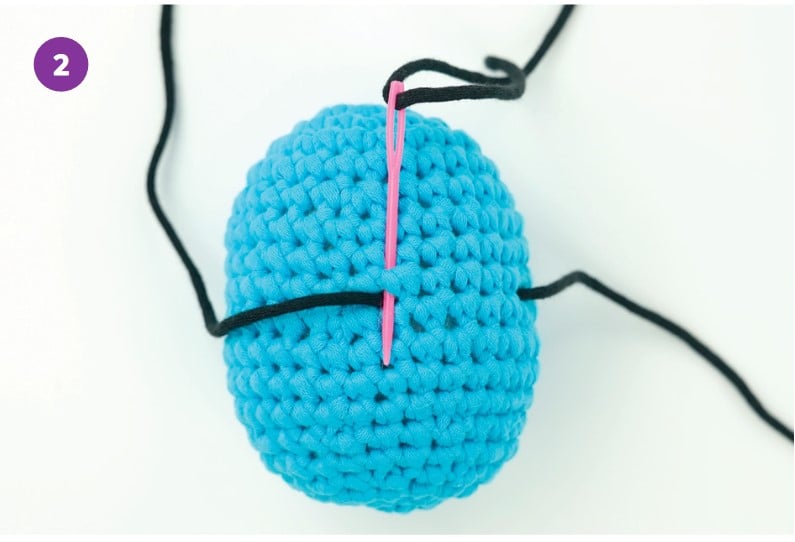
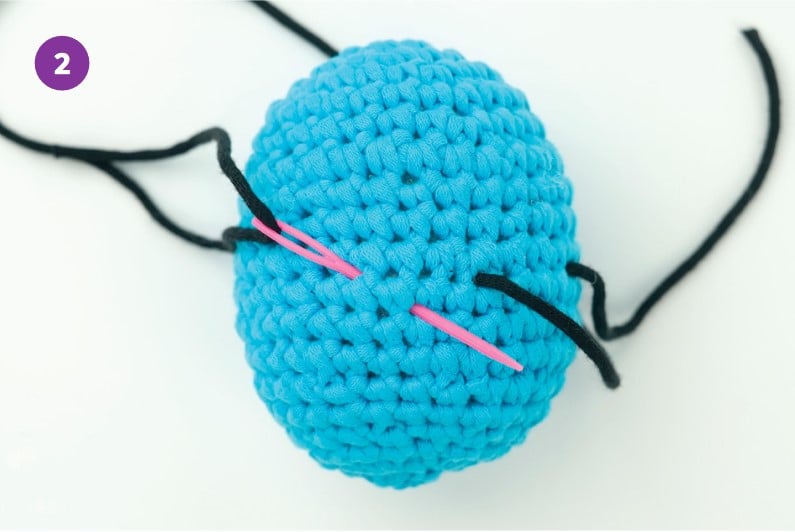
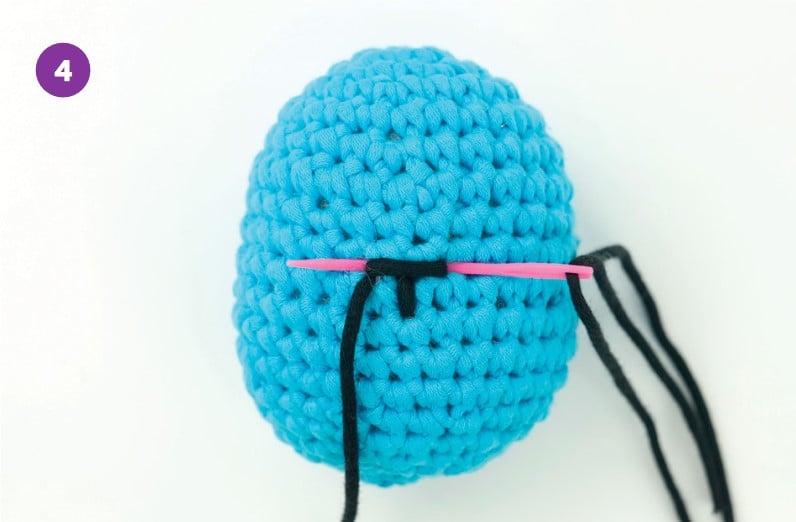
2. Insert the needle one round up and pull it out the same bottom point of the right eye.
TIP
Be careful not to pull the yarn too tight, otherwise the stuffing might be visible above and below the eye.

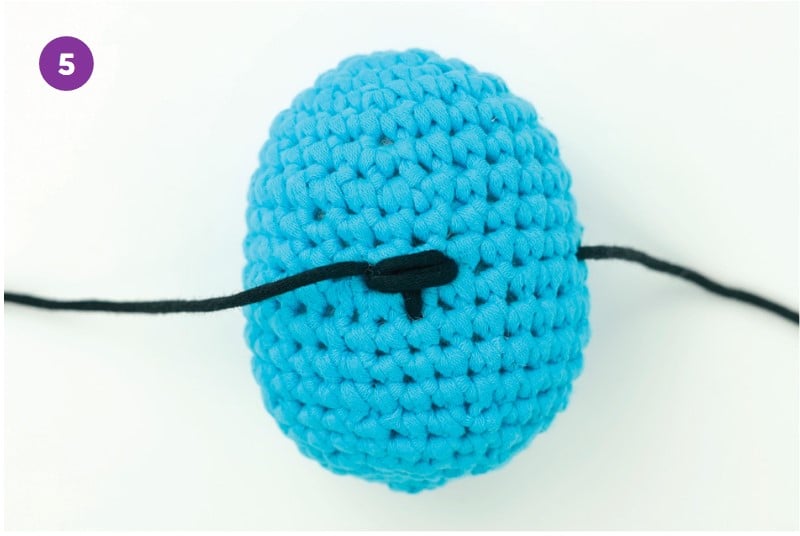
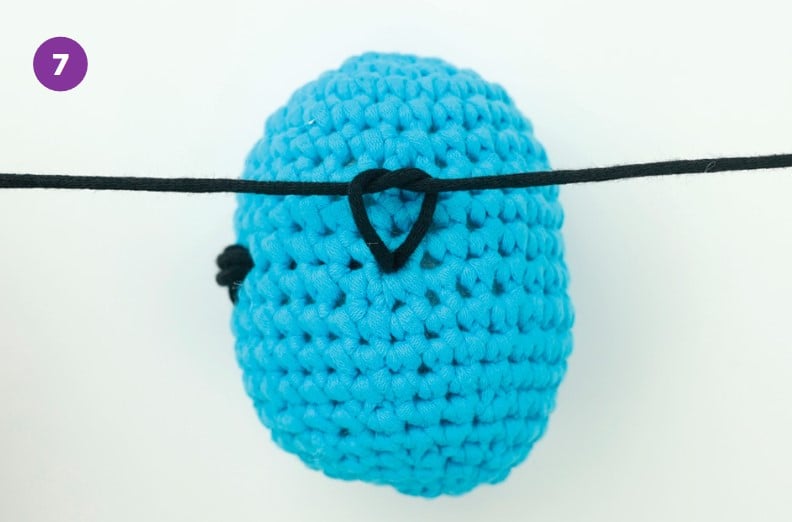
3. Repeat step 3 until the eye is as big as you want, probably at least four times. To make the other eye, insert the needle into the top of the current eye, and pull it out where you want the bottom of the second eye to be.
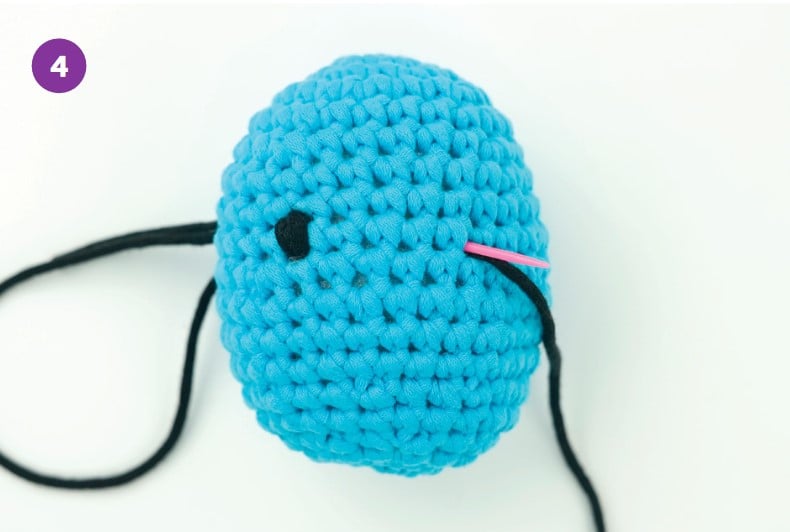
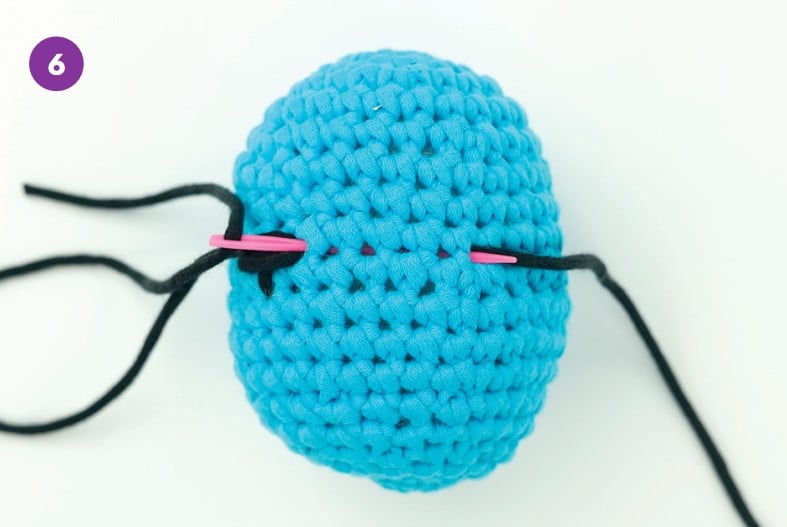
4. Repeat step 3 until the eye is as big as you want. To finish, insert the needle into the top of the current eye and pull it out from the same hole it originally went in, so that both yarn tails are coming out of the same hole.
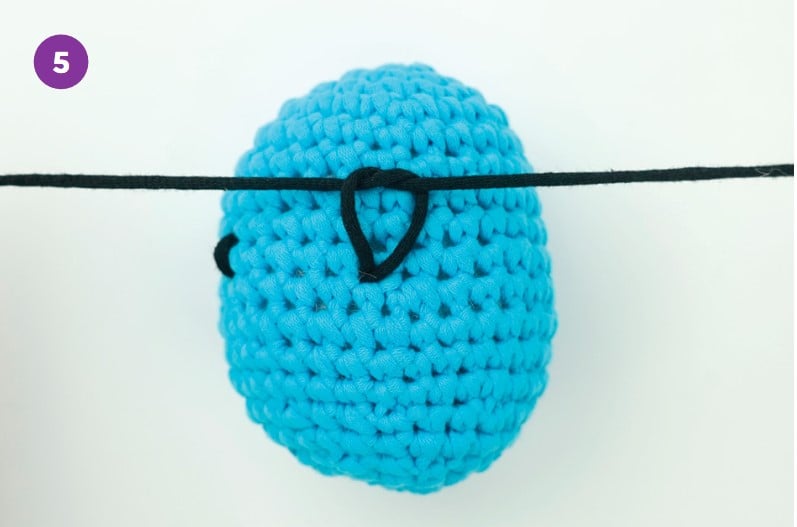
5. Tie a knot with both yarn tails, as close to the surface of the piece as possible. Hide the yarn tails in the piece.
How to embroider blush (step-by-step with photos)
Finish the piece that’ll be embroidered onto.
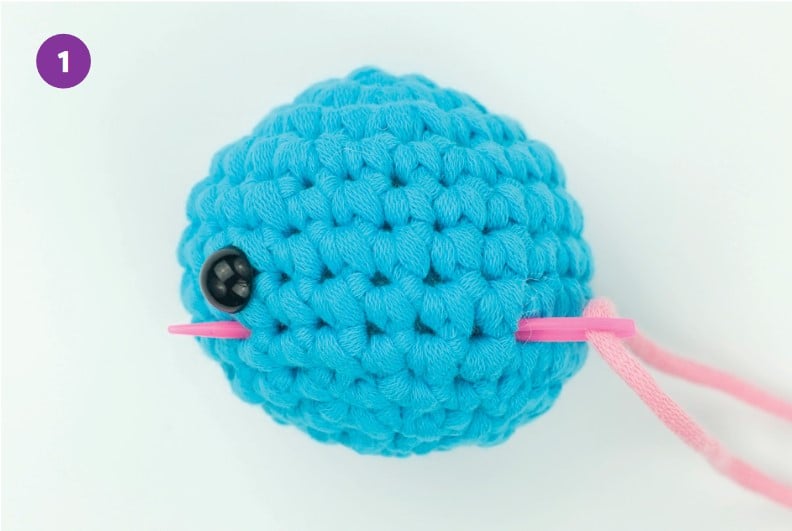
1. Thread a needle with an arm’s length of pink yarn. Insert the needle somewhere on the right side of the amigurumi, and out under the left side of the right eye. Leave a 6-inch yarn tail.
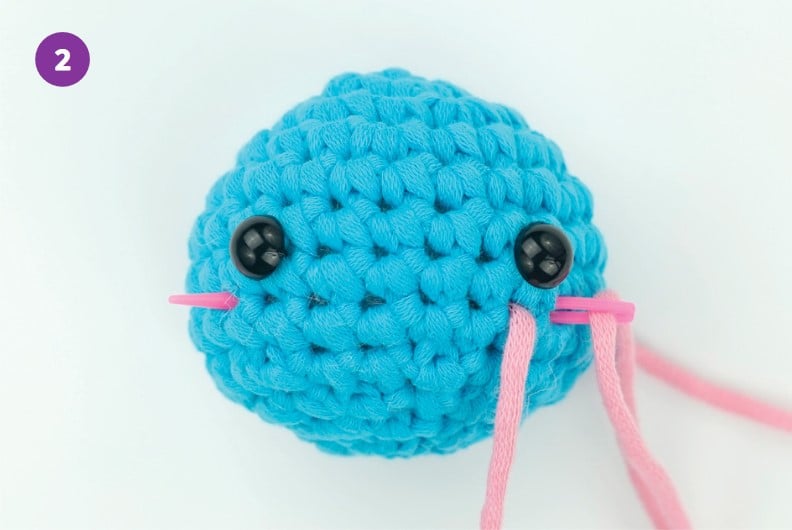
2. Insert the needle one stitch to the right, and out under the left side of the left eye.
TIP
Be careful not pull the yarn too tight, otherwise the stuffing might be visible around the blush.
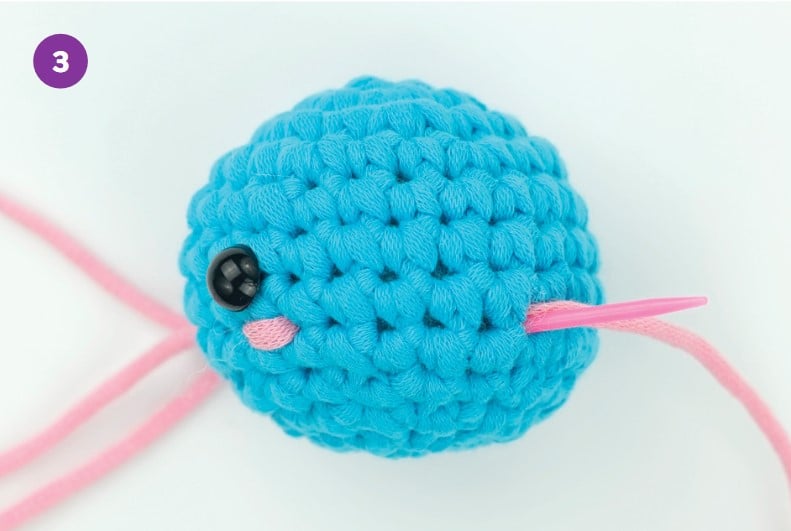
3. Insert the needle one stitch to the right and pull it out the same hole where it originally went in, so that both yarn tails are coming out of the same hole.
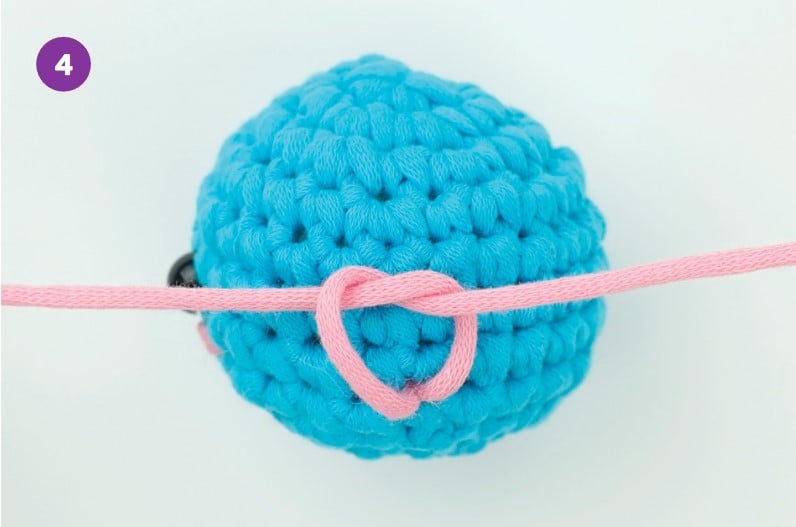
4. Tie a knot with both yarn tails, as close to the surface of the piece as possible. Hide the yarn tails in the piece.
How to embroider a curve (step-by-step with photos)
Finish the piece that’ll be embroidered onto.
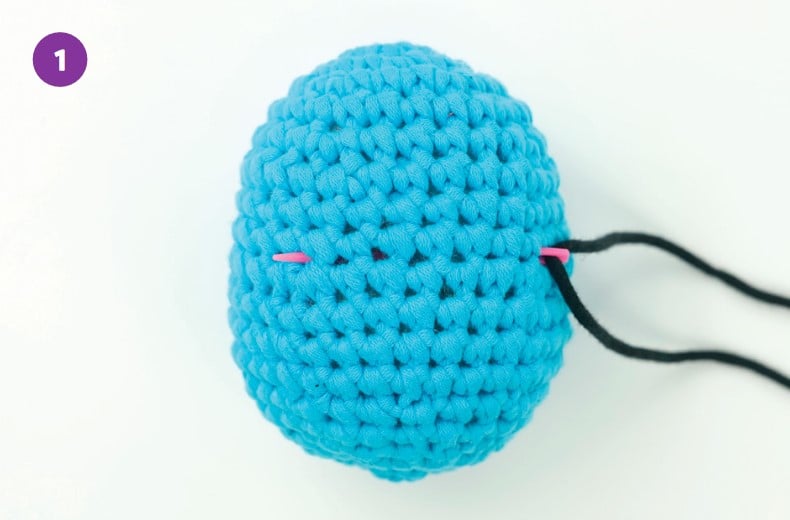
1. Thread a needle with an arm’s length of black yarn. Insert the needle somewhere on the right side of the amigurumi, and out where you want the right end of the curve to be. Leave a 6-inch yarn tail.
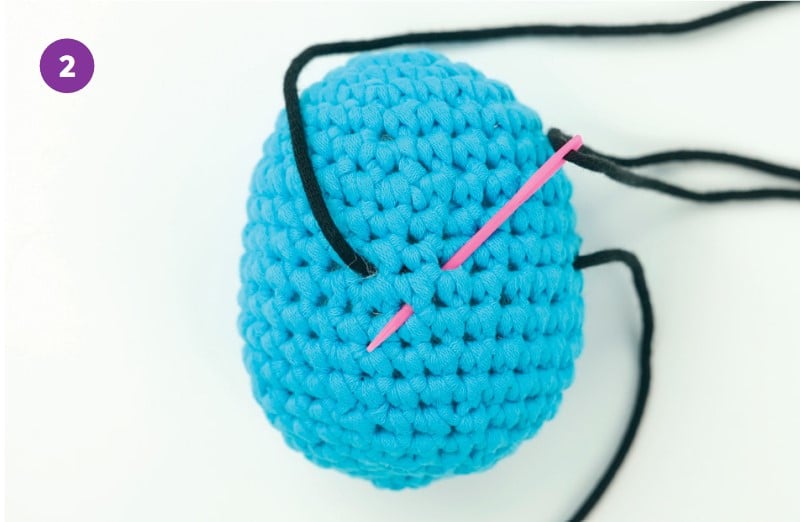
2. Insert the needle where you want the left side of the curve to be, and out where you want the bottom of the curve to be.
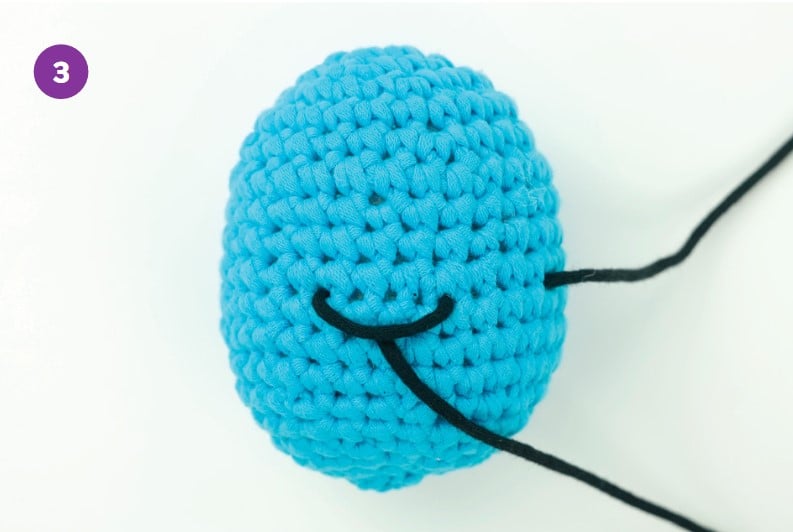
3. Pull the yarn just tight enough so that the curve looks like how you want it.
4. Make sure the needle and yarn came out below the curve. Then bring the needle up and over the curve, and insert the needle in the same hole it just came out of. Pull tight to secure the curve.
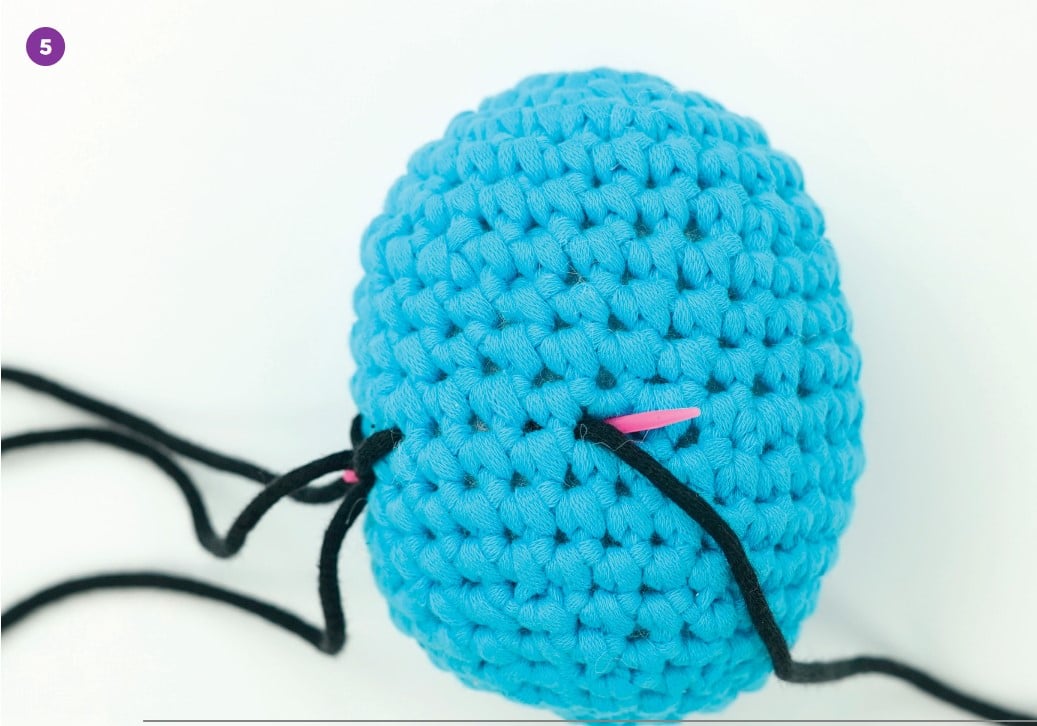
5. Pull the needle out of the same hole in the piece it originally went into, so that both yarn tails are coming out of the same hole.
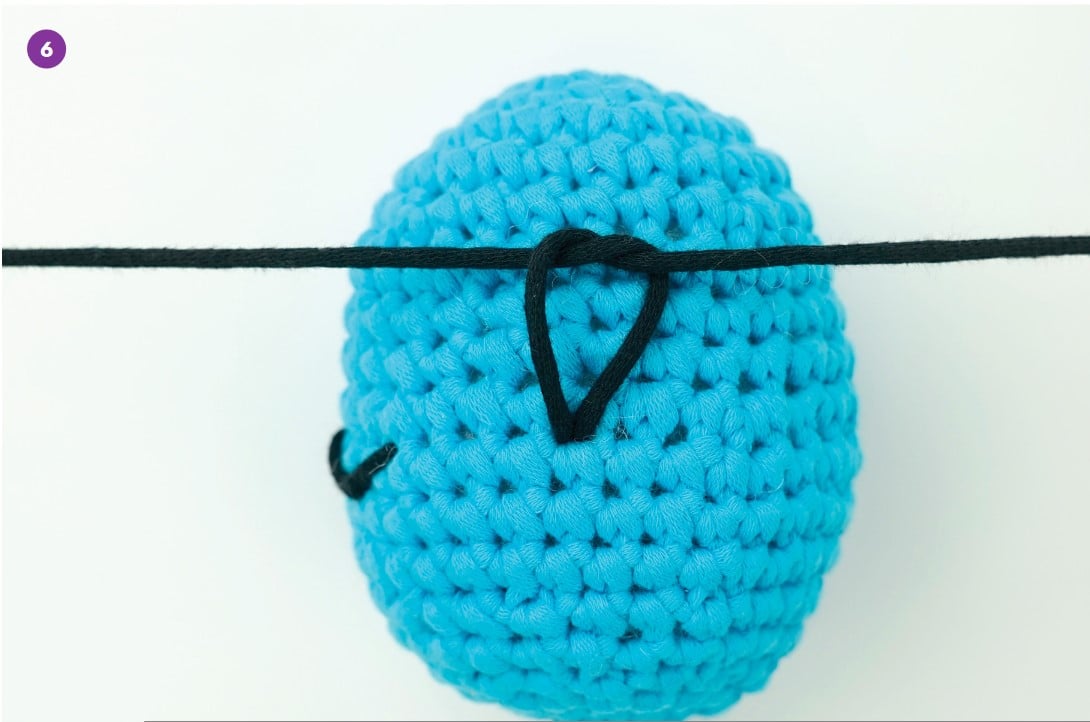
6. Tie a knot with both yarn tails, as close to the surface of the piece as possible. Hide the yarn tails in the piece.
How to embroider a nose and mouth (step-by-step with photos)
Finish the piece that’ll be embroidered onto.
1. Thread a needle with an arm’s length of black yarn. Insert the needle somewhere on the right side of the amigurumi, and out where you want the left side of the nose to be. Leave a 6-inch yarn tail.
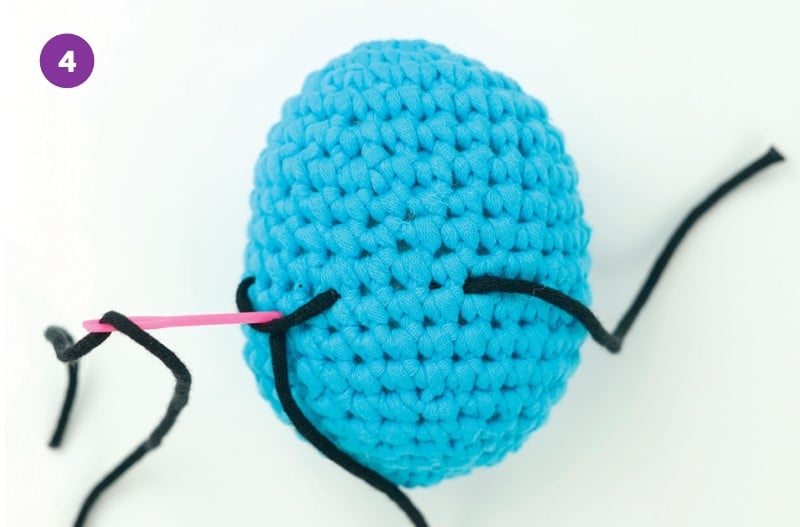
2. Insert the needle where you want the right side of the nose to be, and out below the nose, centered between the left and right sides of the nose.
3. Insert the needle between the left and right points of the nose. Pull it out on the left side of the nose.
4. Insert the needle in the right side of the nose, and out the left side of the nose.
5. Repeat step 5 until the nose is as big as you want, probably at least 4 times.
6. Insert the needle in the right side of the nose and pull it out the same hole in the piece it originally went into, so that both yarn tails are coming
out of the same hole.
7. Tie a knot with both yarn tails, as close to the surface of the piece as possible. Hide the yarn tails in the piece.
Still have questions?
Embroidering eyes on amigurumi is a fun and easy way to add personality and character to your creations. It’s a simple process that even beginners can do with the right tools and instructions.
Yes, you can embroider on crochet. Embroidery is a great way to add texture and color to your crochet. There are a variety of stitches you can use to spruce up your projects, such as decorative stitches, surface crochet embroidery, and lace embroidery. If you’re looking for some guidance on how to get started with embroidering on crochet, there are plenty of helpful tutorials online.
Yes, you can machine embroider on crochet. It’s a great way to add some extra flair to your crochet projects. All you need is the right stabilizer and a few basic techniques. You can use doubled embroidery floss or yarn with a blunt tapestry needle, layer a stabilizer over your item, and follow the crocheter’s basic stitches and techniques.
Still have a question? See our FAQ or e-mail us.