
How to slip stitch join in crochet
If you’ve ever wondered how to seamlessly join rounds and seam pieces together, then you’re in the right place. In this tutorial, we’re going to walk you through the simple steps of the slip stitch join, a versatile technique that you can use for all sorts of projects – from hats and scarves to blankets and amigurumi, to create a seamless join. With the slip stitch join, you’ll be able to achieve a neat and tidy finish without any noticeable seam or gap.
Joining with a slip stitch in crochet (step-by-step with photos)
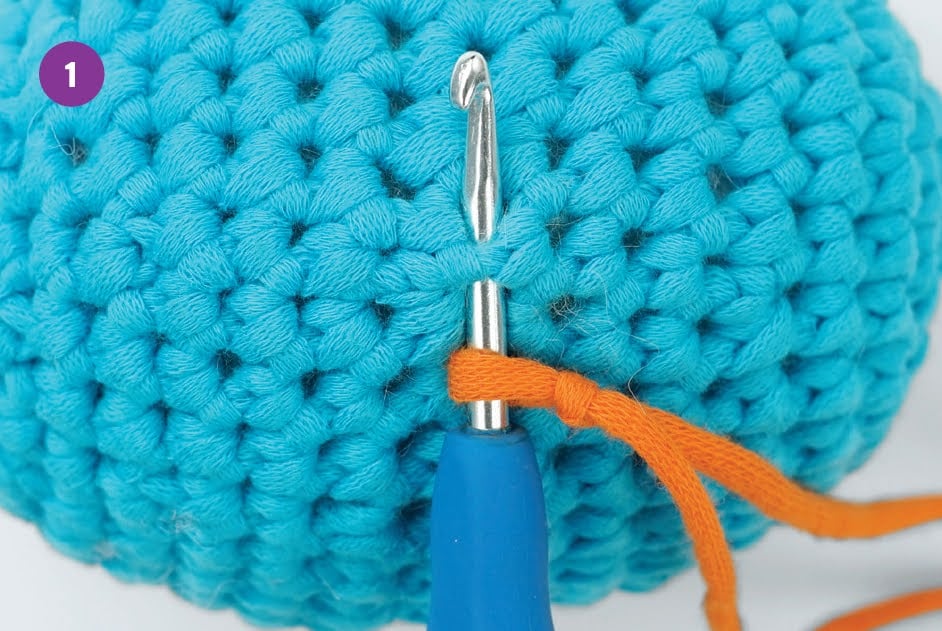
1. Make a slip knot and put it on the hook. Insert the hook under the top loops of the stitch where you’ll be making the sl st join.
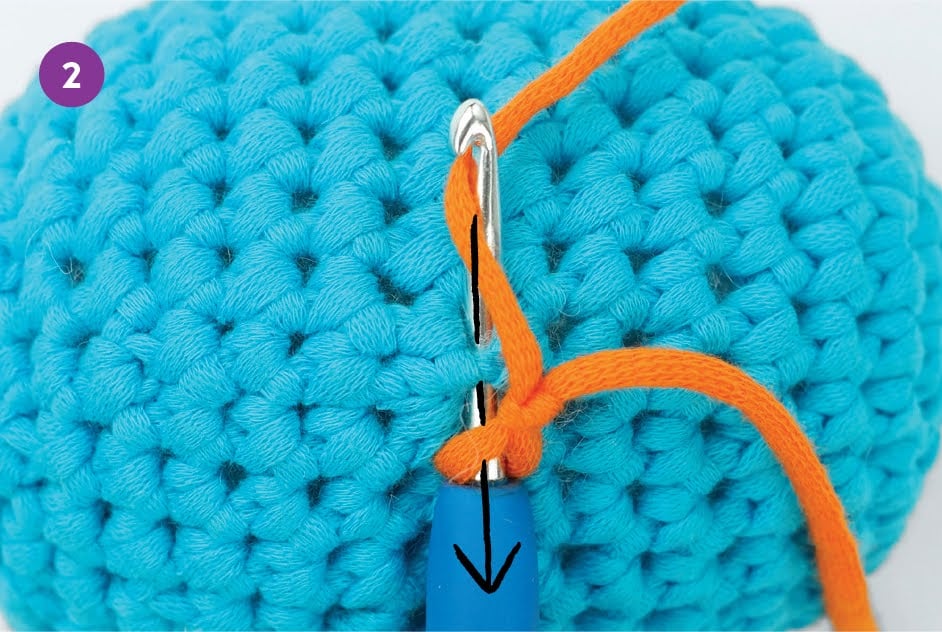
2. Yarn over. Pull the yarn through the stitch and loop on hook to draw up a loop. There should be one loop left on the hook.
Still have questions?
To join new yarn with a slip stitch in crochet, make a slip knot with the new yarn. Insert your hook into the original piece wherever the pattern says to, yarn over with the new yarn, and pull it through both loops on your hook. This creates a slip stitch that joins the new yarn to the original piece.
Once you’ve joined the new yarn, you can continue crocheting as usual.
When you need to join two pieces of crochet together, a slip stitch join is the perfect way to do it. This technique is great for joining granny squares, adding yarn to a finished piece, and more.
Whether or not the slip stitch (often abbreviated as sl st) counts as a stitch depends on the pattern. If you’re working a round of only slip stitches, it counts as a stitch. But for example, if you’re crocheting in joined rounds, the slip stitch is used a stitch to connect the rounds and isn’t considered a stitch.
Still have a question? See our FAQ or e-mail us.